Cracking tart dough is a true nightmare for every pastry chef. This problem has plagued bakers for centuries. Uneven texture, unprofessional appearance, and loss of valuable ingredients are just some of the consequences of baking errors.
Every tart baking carries the risk of failure. Preparing the perfect dough requires knowledge, patience, and the right approach. Small mistakes lead to significant financial losses, especially in professional kitchens.
Proper tart baking techniques eliminate cracking issues. Understanding the causes of damage and effective prevention methods guarantee success. The result is a perfect dough with a smooth surface and stable structure.
Causes of Tart Dough Cracking During Baking
Understanding the mechanisms behind crack formation is the foundation for effective problem prevention. Tart dough is a delicate material requiring a proper balance of ingredients. Errors in composition or preparation technique lead to structural damage.
Incorrect Dough Composition
The primary cause of cracking is an improper ratio of ingredients in the dough. Too much flour makes the dough stiff and prone to cracking. Excess fat causes excessive delicacy and brittleness in the structure.
A lack of moisture in the dough makes the mixture dry. The result is microcracks that appear already during shaping. The temperature of ingredients also plays a key role in the final outcome.
Incorrect sugar proportions affect dough plasticity. Excess sugar crystallizes during baking, creating hard spots. The dough becomes brittle and easily cracks under heat.
Errors in Mixing Technique
Overmixing the dough develops gluten in the flour. The structure becomes rubbery and tense. During baking, these tensions lead to surface cracks.
Inappropriate ingredient temperatures during mixing disrupt emulsification. Cold butter does not blend evenly with other ingredients. Local differences form in the dough’s structure.
An incorrect order of adding ingredients affects the final texture. Adding eggs to an overly hot mixture can cause them to curdle. Uneven structure leads to uneven baking and cracking.
Mixing should be stopped as soon as ingredients combine. Overworking results in tough dough that is prone to cracking.
Selecting Proper Ingredients for Flexible Dough
The quality of raw materials determines the success of the entire endeavor. Each ingredient plays a specific role in the dough’s structure. Proper selection guarantees flexibility and resistance to cracking.
Type of Flour and Its Impact on Structure
Cake flour with low protein content is the best choice. Gluten content below 10% ensures a delicate structure. The dough remains flexible and less prone to cracking.
All-purpose flour can be used if cake flour is unavailable but requires careful handling. Shorter mixing times prevent gluten development.
Special Types of Flours:
- Almond flour increases the moisture of the dough
- Rice flour improves the crispness of the texture
- Potato starch adds elasticity
- Oat flake flour enriches the flavor
Sifting flour removes lumps and aerates the mixture. This process facilitates even mixing of ingredients. The dough becomes uniform and less prone to local stresses.
The importance of fat quality
High-quality butter contains optimal proportions of water and fat. Its plasticity at room temperature allows for easy mixing. Butter that is too hard creates lumps in the dough.
Margarine can replace butter in some recipes. Choosing a product with a composition similar to butter ensures comparable properties. Avoiding margarines with high water content is crucial.
Vegetable oils give the dough a different structure than butter. The dough becomes more moist and elastic. However, some oils may affect the final product’s flavor.
The role of sugar in dough elasticity
Powdered sugar dissolves more easily than granulated sugar. Even distribution of sweetness prevents hard spots from forming. The dough maintains a uniform structure during baking.
The type of sugar affects the hygroscopic properties of the dough. Brown sugar retains more moisture than white sugar. The result is a more pliable and crack-resistant dough.
Tip: Reducing sugar by 10-15% compared to the standard recipe can improve dough elasticity without significant loss of sweetness.
Dough preparation techniques to prevent cracking
The method of preparing the dough is as important as ingredient quality. Proper mixing and handling techniques eliminate structural stresses. The result is a uniform dough with optimal properties.
The creaming method and its advantages
The creaming method involves rubbing butter with sugar until fluffy consistency is achieved. This process incorporates air into the mixture, making it lighter. Gradual addition of eggs prevents emulsion curdling.
The butter temperature should be around 18-20°C (64-68°F). Too soft butter will not maintain emulsion structure. Too hard butter will be difficult to cream and may form lumps.
Creaming time usually lasts 3-5 minutes. The mixture should lighten in color and increase in volume. Extending this process does not bring additional benefits.
Technique for combining wet and dry ingredients
Flour should be added gradually, in several portions. Each portion must be fully incorporated before adding the next one. Dumping all the flour at once hinders even mixing.
Mixing should be done at the lowest mixer speed. Movements should resemble folding rather than kneading the dough. Overmixing develops gluten and toughens the texture.
Order of adding ingredients:
- Dry ingredients sifted together
- Wet ingredients combined separately
- Alternating addition of dry and wet ingredients
- Ending with dry ingredients
The timing of stopping mixing is critical. The dough should just be combined, with no traces of flour visible. Overworking leads to a tough final product.
Tip: The last 30 seconds of mixing should be done manually with a spoon or spatula. This allows better control of the process and prevents overworking the dough.
Proper Rolling and Shaping of Dough in Molds
The process of shaping dough into tartlet forms requires delicacy and precision. Improper techniques lead to structural damage and later cracking. The correct approach ensures even thickness and mold stability.
Preparing the Work Surface
The rolling surface should be cool and dry. A marble countertop or a chilled mat is an ideal solution. A warm surface can cause the dough to stick and become difficult to transfer.
Sprinkling the surface with flour prevents the dough from sticking. The amount of flour should be minimal—just enough. Excess flour can alter ingredient proportions and affect texture.
The rolling pin should be evenly dusted with flour. Regularly cleaning off any dough residue from the rolling pin is essential. Accumulated bits can create unevenness in the rolled dough.
Technique for Even Rolling
The dough should be rolled from the center outward. Movements should be even and gentle. Too much pressure can damage the structure and cause uneven thickness.
Regularly rotating the dough 90 degrees ensures even rolling. Each side should be turned after a few rolling strokes. This prevents sticking to the work surface.
Optimal Rolling Parameters:
- Dough thickness: 3-4 mm for tartlets
- Dough temperature: 12-15°C (54-59°F)
- Number of strokes: minimal needed to achieve uniformity
- Direction: always from center outward
Controlling dough thickness is key for even baking. Special guides or a ruler help maintain consistent thickness. Uneven dough cracks at its thinnest points.
Methods for Transferring Dough to Molds
Rolling the dough onto the rolling pin makes transferring it to the mold easier. This technique minimizes the risk of damaging the delicate structure. The dough should be unrolled slowly, avoiding stretching.
An alternative is folding the dough in half or quarters. This method works well with smaller pieces of dough. Unfolding in the mold requires care to avoid tears.
Using parchment paper can facilitate transfer. Dough rolled out on parchment can easily be flipped over the mold. The paper is removed after placing the dough in the mold.
Tip: Before shaping, it’s advisable to chill rolled-out dough for 15-20 minutes in the refrigerator. Cold dough is easier to handle and less prone to damage during transfer.
Temperature Control Throughout the Baking Process
The oven temperature and its stability determine baking quality. Temperature fluctuations cause uneven expansion of the dough. The result is cracks and deformation of tartlet structures.
Oven Preparation and Calibration
The oven should be preheated for at least 15-20 minutes before baking. A stable temperature ensures even heat distribution. A cold oven leads to uneven baking and cracking of the dough.
An oven thermometer allows you to check the actual temperature. Built-in thermostats often show deviations from the set value. A difference of even 10-15 degrees can affect the quality of the bake.
The rack position in the oven matters for even baking. The middle position provides optimal heat distribution. Tartlets placed too high may burn on top while the bottom remains underbaked.
Optimal Baking Temperatures for Tartlets
A temperature of 180-190°C is standard for most tartlets. Lower temperatures extend baking time and may cause drying out. Higher temperatures cause the outer layer to bake too quickly.
Temperature stages of baking:
- Start: 200°C for the first 10 minutes
- Main baking: 180°C for 15-20 minutes
- Finishing: 160°C for the last 5 minutes
- Cooling: with the oven door ajar for 5 minutes
Different types of molds require different temperatures. Metal molds conduct heat faster than ceramic ones. Adjusting the temperature according to mold type prevents burning or underbaking.
A convection thermostat can lower the temperature by 20-25 degrees. Forced air circulation ensures more even baking. This feature is especially effective when baking larger quantities of tartlets.
Tip: Avoid opening the oven during the first 15 minutes of baking. Sudden temperature changes can cause dough to collapse and crack.
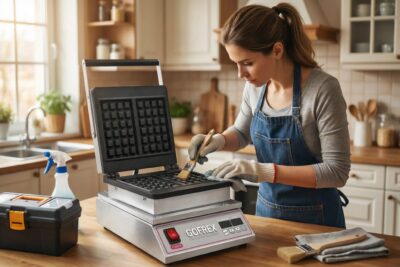
Tartlet Baking Machine at GoFREX Store
Professional tartlet baking equipment revolutionizes the preparation process of these delicate pastries. The GoFREX Store has introduced an advanced technical solution that eliminates major issues related to dough cracking. The shortcrust pastry shell machine meets the needs of professional gastronomy.
Advanced Technology Preventing Cracking
The device uses a contact baking method that ensures even heat distribution. This system eliminates local overheating responsible for dough cracking. Precise control of upper and lower mold temperatures allows optimal parameter adjustment according to dough type.
The electronic thermostat guarantees temperature stability throughout the entire baking cycle. The thickness maintenance mechanism ensures uniform thickness of tartlet walls and bottoms. The result is pastries with perfect structure without cracks.
Interchangeable molds allow production of tartlets in various shapes and sizes. This flexibility enables adaptation of production to current gastronomic needs. The mold exchange system is simple and fast.
Benefits of Professional Equipment
An electronic timer with an audible signal notifies when the baking cycle is complete. This feature eliminates the risk of overbaking and the associated cracking of the dough. Automating the process increases the consistency of results.
The device, measuring 50 × 60 × 40 cm and weighing 25 kg, is designed for intensive use. Its sturdy construction withstands loads typical in professional kitchens. The equipment’s durability ensures many years of trouble-free operation.
GoFREX specializes in providing innovative solutions for the food service industry. The company offers a comprehensive range including waffle makers, baking mixes, and pastry accessories. The extensive selection allows for complete outfitting of food service establishments.
The professional tartlet device significantly reduces production losses related to dough cracking. The investment quickly pays off by eliminating defective products and increasing efficiency.


Best Methods for Blind Baking Tartlets Without Cracks
Blind baking is a key technique to prevent dough deformation. This process involves pre-baking the tartlet shell before adding the filling. Proper execution eliminates cracking and provides a stable base.
Preparing Molds for Blind Baking
Piercing the dough bottom with a fork or special tool prevents puffing. The holes should be evenly spaced every 1-2 cm. Too few piercings can cause air bubbles to form.
Parchment paper should extend about 5 cm beyond the edges of the mold. This facilitates later removal along with the weight. The paper must adhere to all surfaces of the mold, especially in the corners.
Types of Weights for Blind Baking:
- Ceramic baking beads – reusable and even
- Dry beans or peas – economical solution
- Raw rice – accessible and effective
- Coins wrapped in foil – unconventional but effective solution
The weight should cover the entire bottom surface and reach halfway up the sides. Too little weight will not prevent deformation. Too much may hinder even baking.
Controlling Time and Temperature During Blind Baking
The first stage of blind baking lasts 12-15 minutes at 200°C (392°F). High temperature at the start sets the dough structure. Longer time may dry out the edges.
The second stage, after removing weights and parchment, lasts 5-8 minutes at 180°C (356°F). Shorter baking allows slight browning of the bottom. Visual inspection enables adjusting time to achieve desired doneness.
The dough after blind baking should be lightly golden and dry to the touch. Dough that is too pale may be underbaked. Too dark may become brittle and prone to cracking.
Recognizing Signs of Proper Baking
The edges of the tartlet should be evenly browned. Uneven coloring indicates errors in temperature distribution. Regular visual checks allow quick response.
The bottom of the tartlet should show no signs of moisture. A matte surface indicates proper baking. A shiny surface may indicate insufficient baking time.
A gentle tap on the bottom should produce a dry sound. A dull tone may indicate remaining moisture in the dough structure. This test allows you to assess the degree of baking without damaging the tartlet.
Tip: Cooling tartlets in their molds for 5-10 minutes before removing them prevents the fragile dough from breaking. Warm tartlets are more delicate and prone to mechanical damage.
Summary
Mastering the art of baking crack-free tartlets requires combining proper theoretical knowledge with practical experience. Controlling every stage of the process—from selecting ingredients to final baking—determines the success of the entire endeavor. A professional approach minimizes losses and guarantees high product quality.
Modern technologies, such as specialized baking equipment, significantly facilitate achieving perfect results. Investing in professional equipment quickly pays off by eliminating defective products and increasing production efficiency.
Consistent application of the presented techniques and methods leads to masterful control of the tartlet baking process. The result is pastries with excellent texture that will satisfy even the most demanding customers and serve as a hallmark of any professional kitchen.